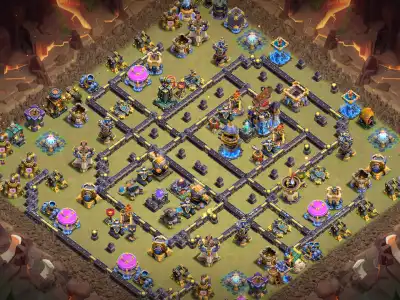


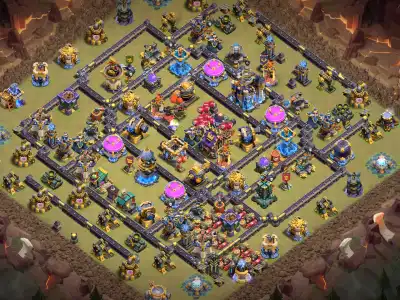
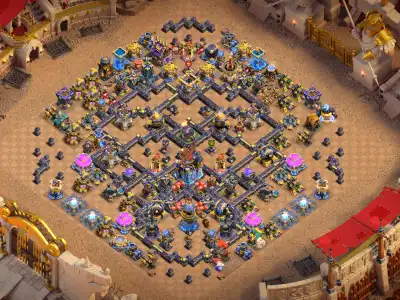
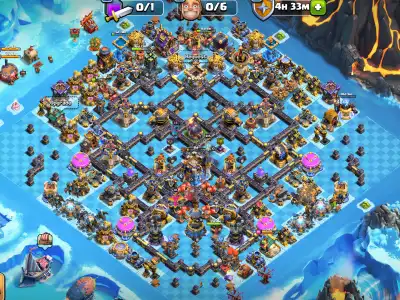

COC Bases: Best TH18 Anti 3 Star Layouts (Copy Links)
Shut down triple attempts with TH18 anti-3-star bases built to split value, break funnels, and force late time fails. Copy any base instantly with 1-tap links.
How to Choose the Best TH18 Anti-3-Star Base
A TH18 anti-3-star base is designed to make a complete village
clear more difficult against prepared attackers. Unlike an anti-2-star layout,
it may accept that the Town Hall or significant destruction will eventually be
secured if enough defensive strength survives to prevent the third star.
The best TH18 anti-3-star layout for your village should divide
the Town Hall, major damage defenses, defensive Heroes and important trap zones
across separate objectives. One Hero dive, Battle Blimp or central push should
not remove the complete defensive plan.
Use the layouts on this page as starting designs for Clan Wars, Clan War Leagues,
Ranked play or other situations where preventing a full clear is the main goal.
Compare Town Hall access, Guardian coverage, defensive Clan Castle activation,
Siege Machine routes and back-end damage before choosing a base.
Separate Major Objectives
The Town Hall, Guardian, Monolith, Spell Towers, Revenge Tower, Super Wizard Tower and major splash defenses should not all be reachable through one planned entry.
Separation forces attackers to divide Heroes, spells and Siege support between different sections instead of solving the complete base with one push.
Preserve Back-End Damage
Important air-targeting, splash and single-target defenses should remain active after the opening and Town Hall sections are attacked.
A layout can still prevent three stars when surviving troops face a strong final section with limited spells, abilities and cleanup time.
Complicate Setup and Pathing
Offset compartments, defended perimeter buildings and varied target positions can make clean funnels more expensive.
The objective is not random troop movement. The layout should deliberately influence where the main army travels after the first compartment falls.
Use Purposeful Trap Zones
Traps should cover likely Hero, troop and Siege Machine routes rather than arbitrary empty spaces.
Spread trap pressure between the opening, Town Hall route and back end so uncertainty remains throughout the attack.
What Is an Anti-3-Star Layout at Town Hall 18?
Anti-3-star base building focuses on preventing the complete clear rather than protecting every building equally. The layout may make one objective accessible when doing so pulls the attacker away from another important defensive section.
For example, an offset Town Hall may encourage an attack from one side while the Monolith, Revenge Tower, Super Wizard Tower or other high-damage defenses remain deeper in the opposite section. A central Town Hall may instead require a large commitment while leaving difficult cleanup and back-end routes.
No layout can make a three-star result impossible. Attacker skill, army choice, Hero levels, equipment, defensive settings and execution all affect the outcome. The purpose of this category is to compare layouts that distribute defensive value and preserve meaningful resistance through the final phase.
Acceptable Two-Star Trade-Off
An anti-3-star layout may allow attackers to secure the Town Hall and enough percentage for two stars if the route leaves them without sufficient army strength to clear the remaining defenses.
Different from Anti-2-Star
Anti-2-star bases prioritize the relationship between Town Hall access and destruction percentage. Anti-3-star bases prioritize objective separation, surviving defenses and the difficulty of finishing the complete village.
Planning the TH18 Town Hall Position
Town Hall placement influences the attacker’s entry, Guardian engagement, Siege Machine route and spell commitment. Central, offset and teaser positions can all support anti-3-star defense when the rest of the village is built around the intended trade-off.
Central Town Hall
A central Town Hall can require attackers to pass through several defensive layers. This may consume Hero abilities, freezes and Siege support before the back-end section is reached.
Avoid turning the center into one overloaded compartment. A successful Blimp or Smash push should not remove the Town Hall, Monolith, Spell Towers and every major splash defense together.
Offset Town Hall
An offset Town Hall can pull the attack toward one side while strong defenses remain across the village.
This creates a decision between securing the Town Hall and building an efficient path toward the back end. Check that the Town Hall does not become an inexpensive objective requiring very little commitment.
Teaser Town Hall
A teaser placement invites attackers to begin from a predictable direction. That route should expose the army to Guardian pressure, traps and overlapping defensive coverage.
Without a clear punishment plan, the placement may simply provide an easy first objective.
Town Hall and Back-End Separation
The strongest final defenses should not all sit directly behind the Town Hall on the same route. Use side compartments and offset targets so the army must change direction after securing it.
Using the TH18 Guardian in an Anti-3-Star Base
Only one Guardian can defend at a time, and each option creates a different defensive interaction. The selected Guardian and its patrol route should support the intended Town Hall approach without giving attackers excessive value from one spell or Hero ability.
Review the Patrol Route
Inspect the Guardian’s patrol area after copying the layout. Confirm that it remains connected to the intended defensive zone and cannot be pulled away too easily during the opening setup.
Support the Guardian
The Guardian should engage inside coverage from other defenses rather than fighting alone. Nearby damage can force attackers to spend additional freezes, abilities or support troops.
Avoid Grouped Defensive Value
Do not place the Guardian beside every defending Hero and major defense. One spell, equipment ability or concentrated entry should not control the entire defensive group.
Match the Guardian to the Layout
Compare the available Guardians according to the Town Hall position, likely air and ground routes and surrounding compartment structure. A Guardian that suits one design may not suit another.
Preserving the Revenge Tower
The Revenge Tower increases its power and hitpoints as buildings are destroyed. In an anti-3-star layout, this gives it the potential to become more influential during the middle and final stages of an attack.
Position it away from the cheapest opening value while keeping it relevant to likely troop routes. Hiding it in an isolated corner where it affects no important path is not useful, but exposing it during the opening prevents it from gaining later value.
- Protect it from early Hero entries: avoid placing it beside the easiest outside defense or funnel target.
- Keep it connected to the back end: its range should affect troops after several buildings have already fallen.
- Avoid excessive Blimp value: do not group it with the Town Hall, Monolith and Spell Towers in one landing area.
- Review its survival timing: defensive replays should show whether it remains active long enough to reach stronger stages.
Positioning the Super Wizard Tower
The Super Wizard Tower can chain its defensive attack through multiple nearby enemies. It is especially relevant when a planned attack brings Heroes, summoned units or grouped troops through the same section.
Protect it from inexpensive opening removal while separating it from other major objectives. One Battle Blimp or Hero push should not remove the Super Wizard Tower, Town Hall area and both Spell Towers together.
Cover Main-Army Routes
Position the tower where ground or air armies are likely to group after committing to the village. Its chain attack is less useful when it only covers an isolated edge.
Preserve It beyond the Setup
Avoid exposing it to an inexpensive Hero or ranged-troop entry. Keeping it active until the main army arrives can increase its influence on the attack.
Defensive Clan Castle Planning
Defensive Clan Castle troops can disrupt Hero timing, force spell usage and affect the main army’s route. Their value depends on when they activate and whether nearby defenses continue attacking during the engagement.
Avoid an Easy Lure
Check whether one inexpensive troop or Hero can activate every defending unit and pull it into a safe area before the main attack begins.
Support the Reinforcements
Clan Castle troops should engage inside meaningful defensive coverage. Reinforcements fighting alone outside the village are easier to isolate and remove.
Match Troops to the Base
Choose defensive troops that support the layout’s intended Town Hall route, Hero interaction or back-end weakness instead of using the same combination in every base.
Confirm the Defensive Setup
Check the intended Clan Castle troops before war or competitive defense. A well-positioned Clan Castle offers no reinforcement pressure when it is empty or contains the wrong setup.
Planning against Battle Blimp Entries
Battle Blimps can deliver troops toward the Town Hall, Monolith, Spell Towers, Super Wizard Tower or another concentrated defensive area. Review both direct and diagonal approaches from every deployment side.
Separate Landing-Zone Value
One successful delivery should not remove several major defenses and create a simple route for the remaining army.
Separate the Town Hall, high-damage defenses and important spell effects where the design allows.
Cover More Than One Blimp Route
Seeking Air Mines, Air Bombs, Sweepers, the Tornado Trap and defensive towers should influence multiple realistic approaches.
Stacking every anti-Blimp trap beside one target leaves alternate routes with little pressure.
Account for Protected Blimps
Attackers may protect a Blimp with Hero abilities, equipment and spells. Do not assume one air trap or Sweeper will stop every planned delivery.
Use Tornado Trap Delay
Place the Tornado Trap where its delay keeps the Blimp, delivered troops or Heroes inside active defensive coverage.
A delay after the surrounding defenses have already been destroyed provides less practical value.
Planning against Ground Three-Star Attacks
Ground armies may use high-hitpoint troops, Meteor Golems, Miners, Hog Riders, Heroes, wall-opening tools and spells to create one controlled route through the village.
Smash and High-Hitpoint Armies
Avoid a direct route through the Town Hall, Monolith, Spell Towers and every major splash defense.
Offset compartments and side objectives can force the main army to split, turn or leave important defenses active.
Miner and Hog Rider Routes
These troops move between defensive buildings. Place Giant Bombs, Spring Traps and splash defenses according to likely target order rather than beside random storages or empty wall gaps.
Hero Dives
One Hero route should not remove the Town Hall, Guardian, Clan Castle, Monolith and another major defense together.
Use wall offsets, defensive coverage and separated objectives to increase the required commitment.
Wall-Opening Plans
Review routes created by wall-breaking troops, Siege Machines and other access tools. One opening should not produce a straight line through the complete base.
Planning against Air Three-Star Attacks
Air attacks may include Electro Dragons, Dragons, Balloons, Lava Hounds, flying Heroes and Battle Blimps. An anti-3-star base should preserve air damage in more than one section.
Reduce Electro Dragon Chains
Separate important defenses enough to reduce repeated chain value. Avoid excessive spacing that isolates defenses or provides simple cleanup routes.
Control Balloon Paths
Review movement between defensive targets and preserve Air Bombs or splash damage for Balloons that survive the first section.
Review Air Sweeper Directions
Point Sweepers toward attractive Town Hall, Blimp and core approaches. Their directions should support the funnel created by outside buildings.
Preserve Back-End Air Damage
Keep Air Defenses, Inferno Towers and other air-targeting pressure active away from the opening. The final group of Balloons or Dragons should not reach a defenseless section.
Recommended Trap Principles for TH18 Anti-3-Star Bases
Trap placement should follow the visible structure of the layout and the attacks appearing in your own replays. These are starting principles rather than fixed combinations for every base.
- Tornado Trap near active defensive damage: use its delay where surrounding defenses can continue attacking a Blimp, Hero or troop group.
- Seeking Air Mines on probable air routes: cover likely Blimp, Dragon, Balloon and flying-Hero approaches without stacking every mine together.
- Air Bombs on grouped Balloon paths: place them where flying troops are likely to gather after changing defensive targets.
- Giant Bombs on realistic ground routes: position them where Miners, Hog Riders or support troops are likely to travel.
- Spring Traps on important crossings: Spring Traps now target one troop, so place them where affecting a high-Housing-Space unit could interrupt movement or timing.
- Skeleton Trap modes: choose ground or air according to the Hero, troop or Siege route the trap should delay.
- Preserve back-end traps: do not commit every trap to the Town Hall or opening section.
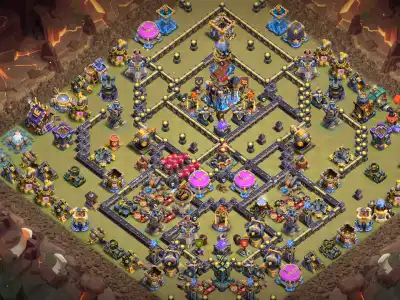
How to Compare TH18 Anti-3-Star Layouts
Do not choose a layout only because it looks complex or widely spaced. Compare whether its structure genuinely preserves difficult objectives after the opening.
- Inspect Town Hall access: identify the commitment needed to secure it and the route available afterward.
- Review Guardian selection: confirm that the selected Guardian and patrol area support the intended Town Hall approach.
- Check major-defense separation: one entry should not remove every important defensive objective.
- Inspect defensive Clan Castle activation: avoid an inexpensive lure before the main army is committed.
- Review Blimp routes: inspect direct and diagonal approaches toward the Town Hall and high-value compartments.
- Check wall access: one wall-opening method should not create a straight route through the village.
- Inspect air and ground balance: both attack types should face meaningful pressure beyond the opening.
- Review trap distribution: traps should protect several likely routes rather than one predictable location.
- Check the Revenge Tower: determine whether it can survive long enough to become more influential.
- Inspect the back end: important damage and cleanup pressure should remain after the Town Hall or core falls.
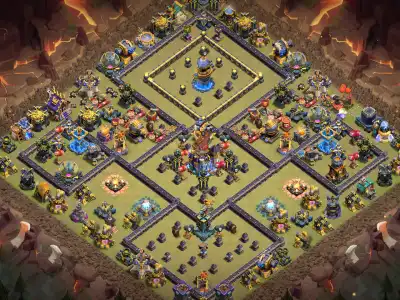
How to Use TH18 Anti-3-Star Copy Links
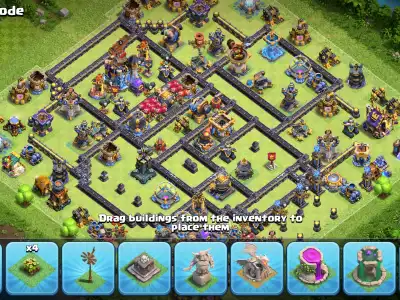
Select a TH18 anti-3-star base copy link to open the design in the Clash of Clans Layout Editor. Confirm that every available building, defense, wall and trap has been placed before saving the layout.
After copying, review Guardian selection and patrol area, Air Sweeper directions, Inferno Tower modes, Spell Tower settings, Skeleton Trap modes, defensive Clan Castle troops and the active Crafted Defense.
Confirm that the copied design is selected in the correct war, Ranked or defensive slot. Saving a base in the editor does not always mean it is active for the upcoming defense.
A working one-tap copy link makes installation easier, but it does not prove that the layout has been tested against every TH18 army or guarantee that it will prevent a three-star attack.
Testing an Anti-3-Star Base
Friendly Challenges can help identify obvious Town Hall, Blimp, Clan Castle and pathing weaknesses before using a layout in an important war.
- Test the most obvious entry: determine whether one side gives too much value.
- Test a Battle Blimp route: check whether one delivery can remove several major objectives.
- Test ground and air plans: a layout that complicates one attack family may expose another.
- Review the back end: determine whether enough defensive strength remains after the planned opening.
- Change one feature at a time: targeted adjustments make it easier to identify which change affected the result.
Common TH18 Anti-3-Star Base Mistakes
- Trying to protect every objective equally: anti-3-star design depends on deliberate trade-offs and surviving defensive sections.
- Creating an overloaded core: one Blimp, Hero dive or Smash push may remove several major defenses together.
- Protecting only the Town Hall: the remaining village may contain an easy route to a complete clear.
- Leaving an easy Clan Castle lure: defending troops may be removed before the main attack starts.
- Exposing the Guardian: attackers may pull or remove it before committing to the Town Hall section.
- Exposing the Revenge Tower early: it may be destroyed before reaching its stronger stages.
- Depending on one trap group: planned attackers may test, bypass or protect troops through that location.
- Stacking all air traps beside the Town Hall: other routes and the back end may receive little protection.
- Using outdated Spring Trap expectations: the trap now targets one troop instead of launching an entire group.
- Leaving one direct ground route: a planned push may connect the Town Hall, core and back end without changing direction.
- Leaving a weak final section: surviving troops may finish the village after the strongest defenses are removed early.
- Replacing the layout after one attack: one three-star result does not necessarily reveal a repeated structural weakness.
When Should You Adjust a TH18 Anti-3-Star Layout?
Review Friendly Challenges and defensive replays for repeated routes. Look for the same Battle Blimp path, Hero entry, Clan Castle lure, air chain, ground push or weak back-end section.
Begin with one targeted change. Adjust a Sweeper direction, revise a wall opening, move an exposed defense, redistribute a trap group, change the Guardian patrol area or update the defensive Clan Castle setup.
Review additional attacks after the change. Confirm that the adjustment reduces the original weakness without creating a simpler route for another strategy.
Should You Rotate TH18 Anti-3-Star Bases?
Rotation can help when the same opponent has already studied a layout, when repeated attacks use the same prepared entry or when game changes alter common TH18 strategies.
Do not replace a layout only because it conceded one triple. A focused adjustment may be more useful when the base continues to create difficult finishes against other attacks.
How These TH18 Anti-3-Star Layouts Are Reviewed
Layouts may be community-submitted or editorially reviewed for their Town Hall level, visible structure, category relevance, image quality and copy-link availability. Editorial review may include Town Hall access, Guardian coverage, defensive Clan Castle activation, objective separation, likely Siege routes and back-end strength.
Publication does not automatically mean that a layout has undergone controlled testing against every TH18 strategy or experienced war attacker. Any layout specifically described as tested should be supported by documented defensive records and a clear testing process.
Read the layout review methodology for information about submissions, editorial checks, corrections and testing labels.
Return to the complete TH18 base layout guide to compare anti-3-star designs with war, anti-2-star, Legend League, defense, farming, hybrid and anti-air categories.
Browse this page to compare TH18 anti-3-star bases, Town Hall 18 anti-three-star layouts and available one-tap copy links. The best design for your village is the layout that separates major objectives, preserves back-end damage and addresses the planned attack routes shown in your defensive replays. No base can guarantee that every three-star attempt will fail.