

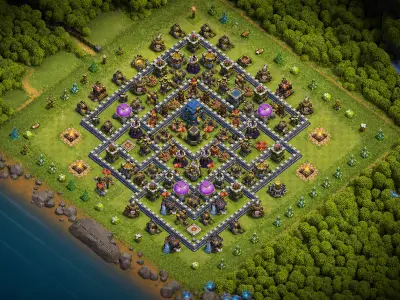
COC Bases: TH12 All Layouts (War, Farming, Defense & More)
All TH12 layouts in one place — war, farming, defense, hybrid, anti-2 star, anti-3 star, anti-air, trophy, and balanced designs for every play style.
Complete Guide to TH12 Base Layouts
Town Hall 12 is the first Home Village level where the Town Hall becomes an
active defensive building. Its Giga Tesla can attack multiple nearby troops,
and destroying the Town Hall releases a powerful explosion that can punish
armies moving through the surrounding compartment.
TH12 also unlocks the Siege Workshop, allowing players to create Siege Machines
that carry Clan Castle reinforcements into an enemy village. This makes
TH12 base layout planning different from earlier levels because
walls alone can no longer control every entry. A Wall Wrecker can open a direct
ground route, while a Battle Blimp or another eligible Siege Machine can bypass
normal compartments.
A useful TH12 layout should therefore protect the Giga Tesla, control Siege
Machine routes, separate the Eagle Artillery from other major defenses, and
maintain enough defensive power after the Town Hall has been destroyed.
Use this hub to choose a war, farming, defense, hybrid, anti-air,
anti-2-star or anti-3-star layout according to your current goal.
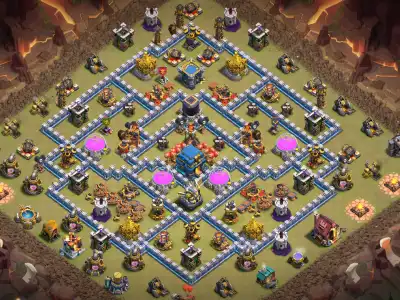
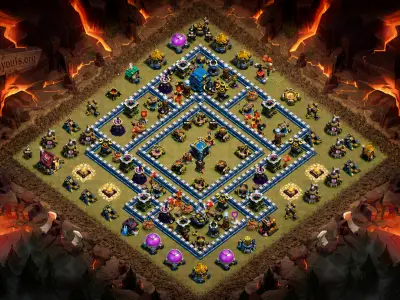
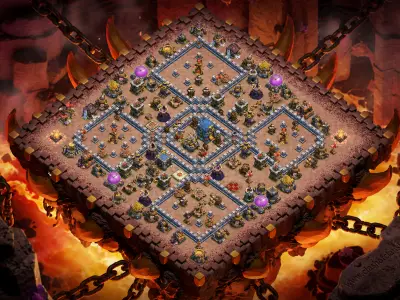
TH12 War Layouts
TH12 war layouts are designed to make a planned three-star attack difficult. They create competing objectives, protect important defenses from inexpensive Hero entries and use traps against likely Siege Machine and main-army routes.
Choose a war layout when Clan Wars or Clan War Leagues are your priority. The base should force attackers to divide Heroes, spells and reinforcements between the Town Hall, Eagle Artillery, Inferno Towers, X-Bows, defending Heroes and Clan Castle troops.
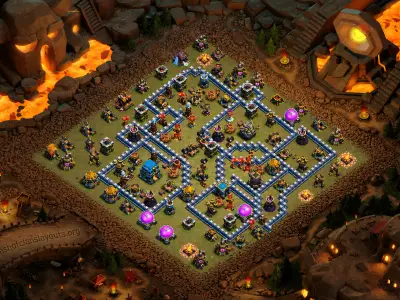
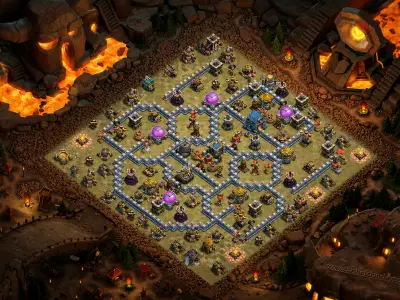
TH12 Farming Layouts
TH12 farming layouts distribute Gold, Elixir and Dark Elixir storages across defended sections of the village. The aim is to prevent one raid from reaching every valuable storage while you continue upgrading Heroes, troops, Hero Equipment, defenses, walls and Siege Machines.
Avoid placing all storages in one compact central group. Separated resource areas can force attackers to choose between collecting loot, securing the Town Hall and completing the rest of the village.
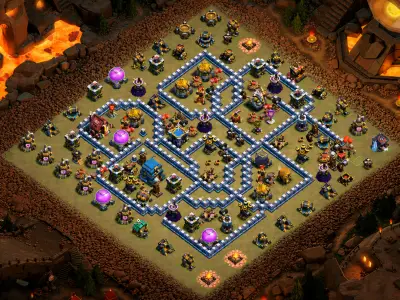
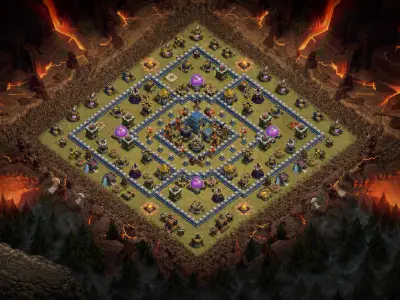
TH12 Defense Layouts
Defense layouts are intended for regular multiplayer and trophy protection. They balance Town Hall access, percentage denial, air and ground coverage, defensive Hero placement and the survival of important back-end defenses.
Choose this category when you want broad protection against several attack styles instead of a base prepared for one specific war opponent.
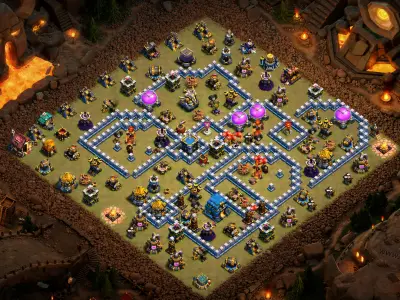
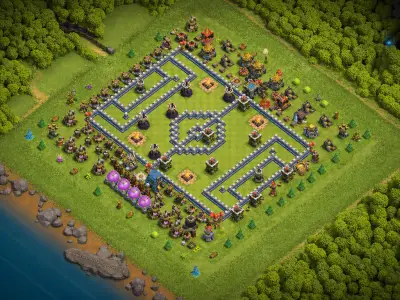
TH12 Hybrid Layouts
Hybrid layouts combine resource protection with trophy and star defense. Storages can act as high-hitpoint buffers, but they should not create a direct path toward the Town Hall or prevent nearby defenses from supporting one another.
This style is suitable when you want one active Home Village design for normal progression instead of switching frequently between separate farming and defensive layouts.
TH12 Anti-2-Star Layouts
Anti-2-star layouts focus on making both the Town Hall and the required destruction percentage difficult to secure. They may use a deeply protected Town Hall, defended outside buildings, dangerous core compartments or Siege Machine routes that require an early spell and Hero commitment.
Choose this style when opponents regularly take the Town Hall and enough percentage without exposing the main part of their army to significant damage.
TH12 Anti-3-Star Layouts
Anti-3-star layouts may allow a determined attacker to reach the Town Hall but try to prevent the complete clear. Major defenses are separated, pathing is less predictable and strong back-end damage remains after the first objective has been removed.
This layout type is useful in war when preventing the third star matters more than producing the lowest possible destruction percentage.
TH12 Anti-Air Layouts
TH12 anti-air layouts use Air Defenses, Sweepers, air-targeting X-Bows, Inferno Towers, Wizard Towers, air traps and defending Heroes to disrupt Electro Dragons, Dragons, Balloons and air Siege Machine approaches.
Use an anti-air layout when your defensive replays show repeated chain value, weak Sweeper coverage, exposed Air Defenses or predictable flight paths toward the Giga Tesla.
TH12 Trophy and Legend-Style Layouts
Trophy and Legend-style layouts should prepare for several army combinations rather than one planned war attack. They need broad coverage, difficult percentage collection and enough back-end damage to challenge troops that survive the Town Hall compartment.
Review several defensive battles before judging a layout. One unusually effective attack does not necessarily reveal a permanent structural weakness.
What Makes Town Hall 12 Base Building Different?
The Giga Tesla is the defining TH12 defense. It remains hidden inside the Town Hall until the building is damaged or the attack reaches its activation condition. Once active, the Town Hall becomes a defensive target and attacks several nearby ground and air units.
When the Town Hall is destroyed, it releases a large explosion. Because Town Hall weapon upgrade levels have been removed, the TH12 Giga Tesla now begins at its full intended strength without requiring separate weapon upgrades.
TH12 is also the first level that can build the Siege Workshop. Siege Machines can carry Clan Castle troops toward the Town Hall or another important section, reducing the ability of a layout to depend entirely on walls and conventional troop pathing.
Giga Tesla Placement
The Town Hall should be placed where activating and destroying the Giga Tesla requires a meaningful commitment. However, placing every major defense beside it can provide too much value from one protected entry.
Review whether the Town Hall creates a difficult objective or simply forms one overloaded core with the Eagle Artillery, Inferno Towers, X-Bows, Clan Castle and defending Heroes.
Siege Machine Routing
Siege Machines can open walls, travel toward important targets or deliver reinforcement troops inside the base. Walls should therefore work with building placement, traps and defensive ranges rather than serving as the only feature controlling an entry.
Inspect likely routes from every side and determine which defenses a Siege Machine can reach before it is destroyed.
Building Around the TH12 Giga Tesla
The Giga Tesla can influence the opening, middle or final section of an attack, depending on the Town Hall position. A successful layout should consider the route toward the Town Hall and what happens to surviving troops after the destruction explosion.
Central Town Hall
A central Town Hall can remain inactive or protected for longer and may force attackers through several defensive layers. This position can support an anti-2-star design, but it should not create one compact core containing every high-value defense.
Use separate compartments and defensive spacing so one successful core entry cannot remove the Town Hall, Eagle Artillery, Clan Castle and multiple Inferno Towers together.
Offset Town Hall
An offset Town Hall can pull the main army away from the Eagle Artillery or another difficult back-end section. Its position should create a meaningful trade-off rather than offering an inexpensive first star.
Check whether attackers can take the Town Hall with only a small Hero group or Siege Machine while preserving the complete main army.
Teaser Town Hall
A teaser-style Town Hall encourages attackers to enter from a predictable side. Traps, defensive Heroes and nearby defenses must punish that choice, or the Town Hall becomes an easy objective.
The route beyond the Town Hall should also be difficult. A successful attacker should not receive direct access to the Eagle Artillery and remaining core immediately after surviving the explosion.
Town Hall Explosion Zone
Consider which troops are likely to stand near the Town Hall when it is destroyed. Walls, storages and defensive buildings can keep the main army inside the blast area or make it difficult to avoid.
Avoid positioning the Town Hall where ranged troops can destroy it while remaining safely outside the dangerous area.
Balancing the Town Hall and Eagle Artillery
The Giga Tesla and Eagle Artillery are two major TH12 objectives. Their relationship can influence which side an attacker chooses and how the attacking army is divided.
Separated Objectives
Separating the Town Hall and Eagle Artillery can force attackers to choose between securing the Town Hall and stopping long-range Eagle damage. The defense left behind should remain capable of affecting the later attack.
Connected Defensive Areas
Placing them in supporting areas can create strong overlapping damage, but only when compartments and spacing prevent one troop group from removing both targets with the same spells and Hero abilities.
Planning for Siege Machines at TH12
Siege Machines change TH12 pathing because they can carry reinforcement troops into or through defended sections. Base builders should review the route of the Siege Machine itself and the location where the Clan Castle troops are likely to appear.
Wall Wrecker Routes
A Wall Wrecker moves toward the Town Hall and breaks walls along its path. Avoid creating a straight line that connects the deployment edge, Eagle Artillery, Inferno Tower, Clan Castle and Giga Tesla.
Offset important defenses so the route toward the Town Hall does not also provide access to every major ground target.
Battle Blimp Routes
A Battle Blimp can fly toward the Town Hall while carrying reinforcement troops. Review direct flight lines from every side and place Seeking Air Mines and other coverage where a Blimp is realistically likely to travel.
Do not place every air trap on one route. Skilled attackers may select another angle after inspecting the visible base.
Stone Slammer and Air Support
Air-based Siege Machine approaches may travel between defensive buildings rather than following walls. Separate important air-targeting defenses and avoid providing a direct route through several valuable targets.
Clan Castle Drop Zones
Consider where reinforcement troops will appear when a Siege Machine is destroyed or reaches its destination. The drop zone should remain under meaningful defensive pressure instead of becoming a safe central deployment area.
How to Position Inferno Towers at TH12
TH12 layouts have enough Inferno Tower coverage to create separate single-target and multi-target defensive roles. Their modes should reflect the attacks appearing in your defense log rather than remain unchanged on every copied layout.
Single-Target Inferno Towers
Single-target mode can pressure Heroes, P.E.K.K.As, Yetis, Golems and other durable troops. Place these towers where attackers cannot remove them cheaply before deploying their high-hitpoint units.
Support them with splash defenses and traps that can handle smaller units used to distract or reset their targeting.
Multi-Target Inferno Towers
Multi-target mode can pressure Witches, Bowlers, Miners, Balloons and grouped support troops. Position these towers where several attacking units are likely to remain within range at the same time.
Avoid placing all multi-target coverage in one section while leaving another route vulnerable to large groups of troops.
Mixed Inferno Settings
A mixture of single-target and multi-target modes can provide broader coverage. This is useful when the layout faces both durable smash armies and large groups of lower-hitpoint troops.
Review Modes after Copying
A copied layout may not automatically use the Inferno settings that match your needs. Check every mode after activating the base and adjust it according to repeated defensive results.
Important Defensive Zones at TH12
TH12 contains several important defenses that attackers may try to remove before deploying the main army. Avoid placing all of them within one Hero path, spell area or Siege Machine route.
- Town Hall zone: create useful Giga Tesla and explosion value without building one overloaded core.
- Eagle Artillery zone: protect it from an inexpensive Queen or Siege Machine entry while avoiding excessive value beside the Town Hall.
- Inferno Tower zones: use single-target and multi-target modes according to the purpose of each compartment.
- X-Bow zones: choose ground or air-and-ground settings based on the routes your layout needs to cover.
- Clan Castle zone: avoid an activation route that lets attackers pull defensive troops safely before the main deployment.
- Air Defense zones: separate Air Defenses and Sweepers so one Hero entry cannot remove the complete anti-air network.
- Defending Hero zones: create multiple defensive encounters instead of grouping every Hero beside the Town Hall.
- Siege Machine routes: avoid straight approaches through several major objectives.
- Back-end zone: preserve enough defensive damage to challenge troops that survive the Town Hall and Eagle Artillery sections.
Common TH12 Ground Attack Threats
TH12 attackers can combine Heroes, Hero Equipment, Siege Machines, Clan Castle reinforcements and several powerful ground armies. No layout should be described as capable of stopping every possible strategy.
Yeti Smash Armies
Yetis unlock at TH12 and can be combined with Bowlers, Witches, Heroes and spell support in a durable central push. Avoid building a straight route connecting the Eagle Artillery, multiple Inferno Towers and the Town Hall.
Use separated objectives, defensive Heroes and back-end damage so the army cannot solve the entire base through one central compartment.
Witch and Golem Armies
Witches can produce large numbers of Skeletons behind tanking troops. Multi-target Infernos, Wizard Towers, Bomb Towers and well-supported traps can pressure the summoned units and support troops.
Avoid placing every splash defense in the opening section, because surviving Witches may become difficult to stop near the back end.
Miner and Hog Rider Hybrid Armies
Hybrid attacks combine Miners and Hog Riders with a Hero-created funnel. Place Giant Bombs, splash damage and defending Heroes along likely defense-to-defense paths rather than filling unused spaces.
Avoid one broad route through the complete base where both troop types can remain under the same healing support.
Queen Charge Entries
A Queen Charge may remove the Eagle Artillery, Clan Castle troops, an Inferno Tower and another important defense before the main army begins. Separate these targets so one Queen route cannot collect all of the value.
Common TH12 Air Attack Threats
Electro Dragon Armies
Electro Dragons punish closely grouped buildings by chaining damage between targets. Increase spacing around the Town Hall, Eagle Artillery, Air Defenses and other important buildings where the layout allows.
Avoid predictable building lines that lead chain attacks directly through the defensive core.
Dragon and Balloon Armies
Dragons and Balloons can take advantage of exposed Air Defenses, weak Sweeper directions and direct flight paths. Spread air coverage so one entry cannot remove the complete anti-air network.
LavaLoon Attacks
Lava Hounds can absorb Air Defense fire while Balloons travel between defensive buildings. Distribute Seeking Air Mines, Air Bombs and splash damage across realistic flight routes instead of placing every trap near the first Air Defense.
Battle Blimp Entries
A Battle Blimp can deliver high-damage reinforcement troops near the Giga Tesla while bypassing walls. Review direct routes toward the Town Hall and make sure the landing area remains defended.
Reducing Electro Dragon Chain Value
Electro Dragon attacks are a common reason to consider building spacing at TH12. Spacing does not mean placing every structure far apart. The objective is to prevent one chain from repeatedly reaching important buildings along a predictable line.
Separate Important Buildings
Avoid placing the Eagle Artillery, Air Defense, Inferno Tower and Town Hall in one chainable sequence. Less important buildings can be positioned between valuable defenses to interrupt efficient chains.
Review Corner and Edge Chains
Outside buildings may allow Electro Dragons to begin chaining before entering meaningful defensive coverage. Adjust edge spacing when replays show repeated value from one deployment side.
Support Air Defenses
An isolated Air Defense may be removed before it affects the main army. Use Archer Towers, X-Bows, Teslas, traps and other defenses to create overlapping air pressure.
Avoid Predictable Sweeper Coverage
Air Sweepers should point toward likely Dragon, Balloon and Blimp approaches. After copying a layout, confirm that their directions support the actual Town Hall and Air Defense positions.
Hero Equipment and TH12 Pathing
Hero Equipment is available below TH12 and allows attackers to change the roles and abilities of their Heroes. A TH12 layout should not assume that every Barbarian King, Archer Queen or Grand Warden will be used in the same way.
Avoid Straight-Line Defensive Value
Do not align several important defenses along one direct line from the edge. Long-range or wall-opening equipment may allow a Hero to affect multiple targets from one entry.
Create Separate Hero Objectives
One Hero route should not remove an Air Defense, Inferno Tower, Eagle Artillery, Clan Castle and Town Hall without changing direction or entering another defensive area.
Protect Edge Defenses
Check whether important buildings can be removed from outside the village while an attacking Hero remains under healing or equipment support. Use overlapping defensive ranges to make edge entries more expensive.
Separate Defending Heroes
Defending Heroes placed in different areas create multiple encounters. This reduces the chance that one spell or Hero Equipment effect controls every defensive Hero together.
Ground Defense at TH12
TH12 ground defense depends on the relationship between walls, Inferno Towers, X-Bows, Bomb Towers, Giant Bombs, Teslas and defending Heroes. Walls should influence troop movement, but they should not be the only feature keeping attackers away from important targets.
Create Multiple Ground Routes
Use compartments and building offsets to make troops choose between objectives. One Wall Wrecker route or opening should not connect every major defense in a straight line.
Protect Single-Target Damage
Single-target Inferno Towers can pressure Heroes, Yetis, P.E.K.K.As and other durable troops. Protect them from inexpensive removal and support them with splash defenses.
Build Useful Trap Zones
Place Giant Bombs and Skeleton Traps where Miners, Hog Riders, Heroes or smash troops are likely to group after crossing a wall or changing targets.
Preserve Back-End Damage
Keep enough ground-targeting defenses active after the Town Hall falls. A base that uses all of its damage in the first compartment may become easy to finish.
Air Defense at TH12
Anti-air strength depends on the relationship between Air Defenses, Sweepers, air-targeting X-Bows, Inferno Towers, Archer Towers, Wizard Towers, air traps and defending Heroes.
Separate Air Defenses
Do not allow one Queen Charge, spell group or Siege Machine route to remove several Air Defenses before the main air army is deployed.
Review Air Sweeper Directions
Air Sweepers should protect likely Dragon, Balloon and Battle Blimp routes. Their directions should support the Town Hall position instead of pointing toward areas attackers rarely use.
Distribute Air Traps
Preserve some Seeking Air Mines and Air Bombs for the middle and back end. Placing every trap on the opening side may leave surviving air troops unchallenged later in the attack.
Protect the Back-End Air Zone
Keep enough air-targeting defenses active after attackers reach the Town Hall. One strong final air-defense section can force additional spells or prevent surviving Balloons and Dragons from finishing the village.
TH12 War Layout or Trophy Layout?
A war attacker can study the base and prepare a specific army, Siege Machine, reinforcement combination, Hero Equipment setup and entry plan. War layouts therefore benefit from uncertain pathing, separated objectives and traps aimed at likely custom attacks.
Trophy and regular defensive layouts may face a broader range of armies over several battles. They need balanced ground and air coverage and should avoid one weakness that can be repeated by many attackers.
Choose a War Layout When
Your priority is preventing a planned three-star attack, preserving difficult back-end defenses and forcing attackers to divide Heroes, spells, Siege Machines and troops between several objectives.
Choose a Trophy Layout When
Your priority is broad performance against several army combinations and reducing repeated high-destruction results across multiple defensive battles.
How to Choose a TH12 Layout from This Page
Begin with the intended purpose of the layout rather than choosing the most compact or unusual-looking design. Farming, anti-2-star and anti-3-star bases should be evaluated according to different defensive goals.
- Choose the correct category: decide whether your main goal is war, farming, trophy defense, resource protection, air defense or star denial.
- Inspect the Town Hall route: identify which Heroes, troops and Siege Machines can reach the Giga Tesla from each side.
- Review the explosion zone: determine which troops are likely to remain close to the Town Hall when it is destroyed.
- Check the Eagle Artillery relationship: decide whether it creates a separate objective or excessive value beside the Town Hall.
- Review Inferno Tower modes: select single-target or multi-target settings according to the attacks shown in your defense log.
- Inspect Siege Machine routes: avoid one Wall Wrecker or Battle Blimp path through several important objectives.
- Inspect air coverage: review Air Defenses, Sweepers, X-Bows, traps and likely Dragon, Balloon or Blimp paths.
- Inspect ground routes: check walls, Inferno coverage, Giant Bomb zones and likely Yeti, Witch or hybrid movement.
- Check the back end: enough defensive power should remain after the attacker reaches the first major objective.
- Match your upgrade levels: a copied base may perform differently when its Heroes, defenses, Siege Workshop or walls are still being upgraded.
How to Use TH12 Copy Links
Open the copy link for the layout you want and review the full design in the Clash of Clans Layout Editor. Confirm that every building, wall, trap, defense and Hero position has been placed before saving or activating the base.
The Giga Tesla no longer requires separate weapon upgrades and is available at its full intended strength. However, the rest of the copied layout may behave differently when your defenses, Heroes and walls are below the levels used by the original creator.
After copying, inspect Inferno Tower modes, X-Bow settings, Air Sweeper directions, defending Hero positions, Clan Castle placement, Town Hall access, Siege Machine routes and trap groups.
Treat the copied layout as a starting design. Make targeted adjustments according to your upgrade levels and the attack routes shown in your defensive replays.
Common TH12 Base-Building Mistakes
- Building one overloaded core: grouping the Town Hall, Eagle Artillery, Clan Castle, Inferno Towers and defending Heroes can provide excessive value from one entry.
- Ignoring Siege Machine routes: walls alone cannot stop a Wall Wrecker or prevent an air-based Siege Machine from approaching the Town Hall.
- Leaving a direct Wall Wrecker line: one path should not connect the Eagle Artillery, Inferno Towers and Giga Tesla.
- Leaving the Battle Blimp route unprotected: attackers may deliver reinforcement troops directly into the Town Hall compartment.
- Ignoring the Giga Tesla explosion: troop movement and positioning when the Town Hall falls should be part of the defensive plan.
- Using identical Inferno settings without review: the layout may need a mixture of single-target and multi-target coverage.
- Creating excessive chain value: grouped buildings can make Electro Dragon attacks more efficient.
- Exposing the Eagle Artillery: a Queen entry may remove it before the main army is deployed.
- Using every trap at the opening: surviving troops may face little trap pressure near the back end.
- Designing only against one army: a ground-focused layout may leave an obvious air route, and the reverse is also true.
- Copying defensive settings without review: Inferno modes, X-Bow settings and Sweeper directions should support the actual design.
- Replacing a layout after one replay: evaluate repeated attack patterns before deciding that the complete base has failed.
When Should You Change Your TH12 Layout?
Adjust the layout when several defensive replays show the same successful Wall Wrecker line, Battle Blimp route, Queen Charge, Town Hall approach, Electro Dragon chain or unprotected back-end compartment.
Begin with a targeted adjustment instead of replacing the complete layout. Change a wall opening, move an exposed defense, separate chainable buildings, alter a trap group, revise an Inferno mode, reposition a defending Hero or strengthen the final section of the village.
Review additional defensive battles after each meaningful change. Changing too many parts at once makes it difficult to determine which adjustment improved or weakened the layout.
Why Rotating TH12 Layouts Can Help
Layout rotation can be useful when opponents recognize the same design or when one base repeatedly performs poorly against the armies common in your current league or Clan War environment.
Rotation should be based on defensive evidence rather than a fixed schedule. Keep separate layouts for war, farming, trophy defense and anti-air use when those goals require different Town Hall positions and defensive structures.
How These TH12 Layouts Are Reviewed
Layouts may be community-submitted or editorially reviewed for their Town Hall level, image, category, visible structure and copy-link availability. Publication does not automatically mean that a layout has undergone controlled defensive testing.
Visit the layout review methodology to learn how submissions, descriptions, corrections, review labels and testing information are handled.
Explore this page to choose a TH12 base layout for war, farming, trophy defense, resource protection, air defense or star denial. No Town Hall 12 Clash of Clans base can guarantee a successful defense. Review your defensive replays and adjust Giga Tesla access, Siege Machine routes, Inferno Tower modes, defending Heroes, traps, walls and back-end compartments according to the attacks you actually face.