Battle-Optimized BH10 Coc Layout | Haaland | Builder hall 10

Latest Reviews ()
Strategy Explanation
This BH10 war layout is built around a tight Stage 1 diamond core and a trap-heavy Stage 2 with a big empty flank. The goal is to waste time, split armies, and force the Battle Machine through Crushers and stun chains while air is covered from multiple angles. Stage 1 groups the strongest defenses around the Builder Hall with short compartments that keep pathing unpredictable. Stage 2 moves almost everything to one side of the board and leaves a wide, bare approach on the opposite edge to bait spam drops and make troops walk before they ever reach the kill box.
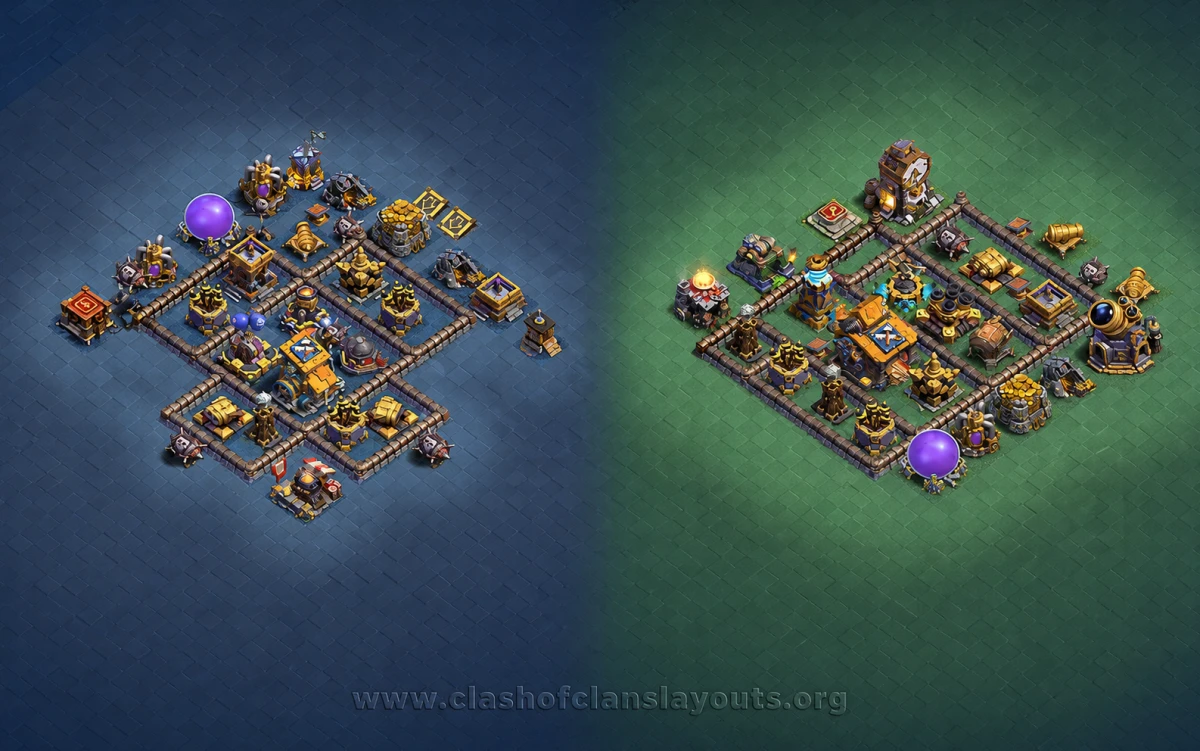
In Stage 1 (bottom image), the Builder Hall sits deep in the center behind layered walls. Mega Tesla, Giant Cannon, Roaster, and Crushers are all tucked into the inner rings, with Firecrackers and Air Bombs staggered around them. Utility buildings ring the outside to slow the opening minutes. There’s a purple Elixir Storage placed well outside the main ring to pull pathing and delay cleanup.
Stage 2 (top image) clusters the core defenses and the Outpost inside a compact square. The whole left half is intentionally empty, so mass troops dropped there walk a long lane into stacked point damage, splash, and spring traps. An exposed Elixir Storage on the right adds more pathing weirdness and baits sneaky snipes into trap zones.
Strengths
- Two-stage time pressure: The empty flank in Stage 2 plus spread-out trash buildings in Stage 1 chew the clock. Most attacks finish Stage 1 at low time and then run short on Stage 2.
- Battle Machine denial: Crushers are positioned to meet BM entries, while the Giant Cannon and Mega Tesla cover the core so you can’t walk straight to the Hall.
- Anti-air layering: Firecrackers and the Air Bombs are staggered so Drop Ship/Minion or Beta Minion waves take crossfire before reaching the heart.
- Trap synergy: Tight corridors in Stage 1 and the single-sided Stage 2 box make spring traps and mines very consistent.
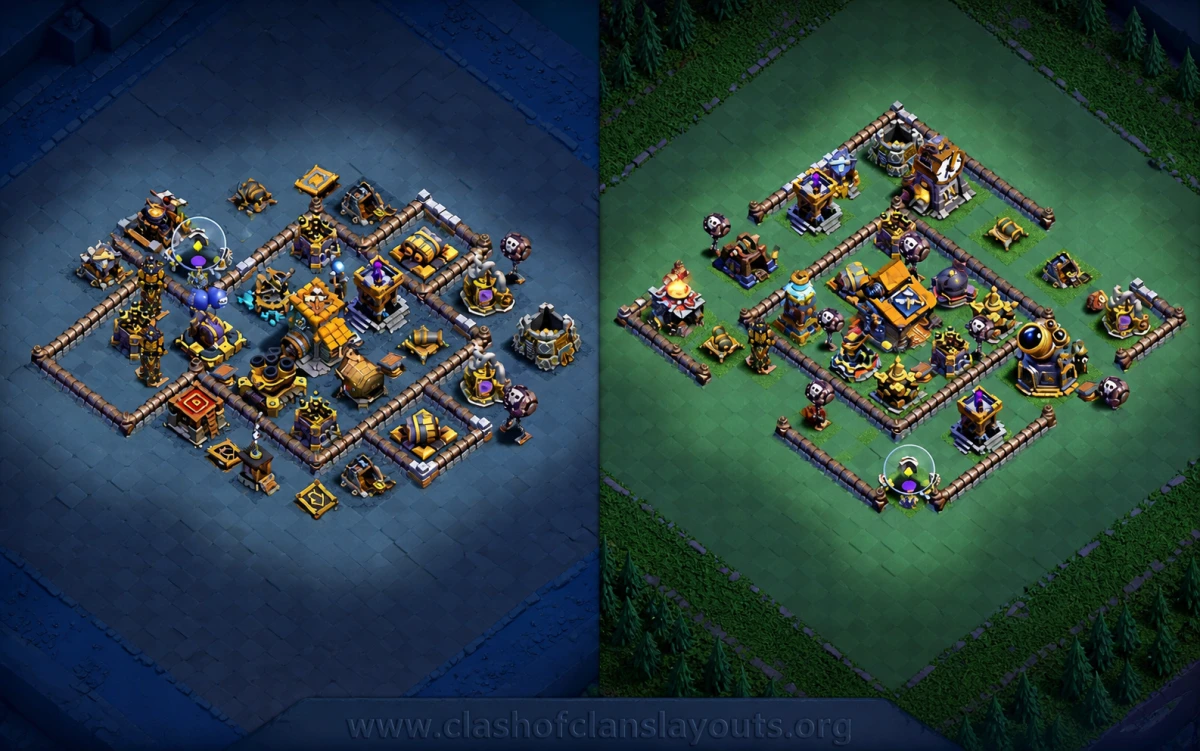
Stage 1 Breakdown
- Diamond core with short compartments forces wall breaks and awkward reroutes.
- Mega Tesla and Giant Cannon overlap the Builder Hall to punish late pushes.
- Roaster centralizes to melt archers and minions that stack on corners.
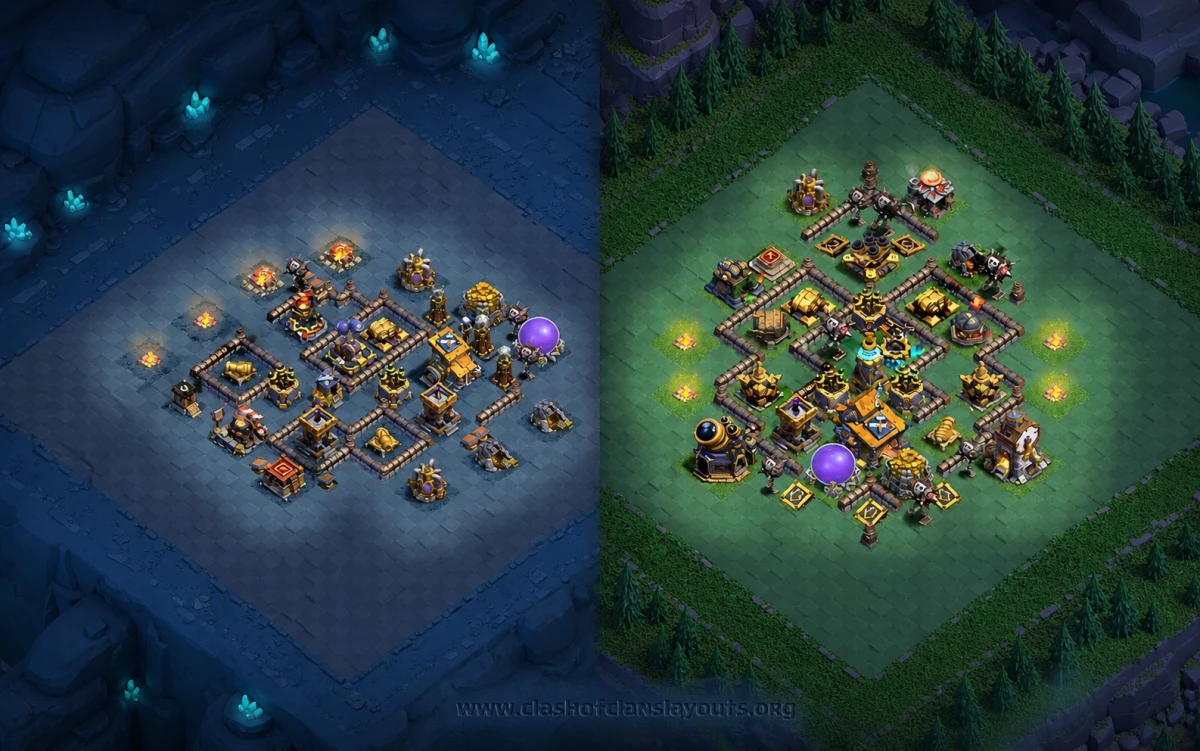
Stage 2 Breakdown
- Right-side compact box houses the Outpost and key damage; left side is mostly empty to bait drops and waste time.
- Storages act as HP buffers so troops stall under point fire.
Defender Tips
- Hide spring traps in the narrow Stage 1 lanes that lead into Crushers.
- Place mega mines where Drop Ships land from the empty flank in Stage 2.
- If your opponents favor ground, shift one Firecracker to cover the Roaster; versus air-heavy clans, push an extra point defense into the Stage 2 box.
Attacker Notes
- Scout the empty side in Stage 2—walk time is a real win condition for the defender.
- Use a few minions/archers to trim the isolated storage before committing the main push.
- Save a stun window (Hog Gliders) to cross the Crushers; otherwise BM gets deleted at the core.